How to link an Avada Modal to a custom Fusion Builder Button
Setting up a modal in Avada is straightforward, but the trigger option is extremely limiting. As described on the Theme Fusion Avada documentation website, there are 3 steps to setting up a modal.
First you create your Modal Element, then you insert a Modal Trigger Element within the page, and lastly you link them up with your new modal’s unique identifier. The issue is that the Fusion Builder Modal Trigger Element is so basic, that essentially you’re limited to a word, sentence or an <img> element. Yes, you can spice it up in the provided HTML area, but out of the box, it’s limited.
How to use a Button Element instead of a Modal Text/HTML Link with a Modal Element
The Avada Button Element is a highly-configurable builder component, and while it natively isn’t intended to open modals, it’s fully able to be set as a trigger. Coming up are the steps to link an Avada Modal to a Fusion Button.
Step 1 – Create the Modal
Create your modal and give it its unique identifier name. When I’m working with the back-end Avada Builder, I like to place the modal at the bottom of the page. Since it’s a hidden element, it can be put anywhere, but I find that by keeping modals towards the bottom, the back-end builder can stay visually representative of the front-end. If you prefer working with the front-end Avada Live Navigator, the Modal can be inserted anywhere.
I’ll use my project tanspire.com as an example. I originally built it on my personal Foundation 6 project boilerplate, but am currently in the process of converting the site to WordPress using the Avada theme. After inserting my Modal Element, I named it bookingModal to represent what action it triggers.
Step 2 – Create your custom Modal Button
With the modal finished, insert your Fusion Button Element where you want it placed within your page. You can make full use of all of the Element’s design options, so go crazy. For now, ignore the Button URL. We’ll be coming back to this.
My Fusion Button Trigger Element for Tanspire.com Booking Modal
(If any of the Youtube videos fail to load, just refresh the page)
Step 3 – Insert a Modal Link Element
We will be triggering the modal with the custom Button created in Step 2, but first we need to extract the HTML markup from a standard Modal Text / HTML Link Element. This Modal Link Element is only temporary, so it can be placed anywhere in the page. Create the trigger and link it to your modal with its unique identifier name. It will be deleted, so there is no need to publish these changes.
Step 4 – Preview the Page and open Developer Tools
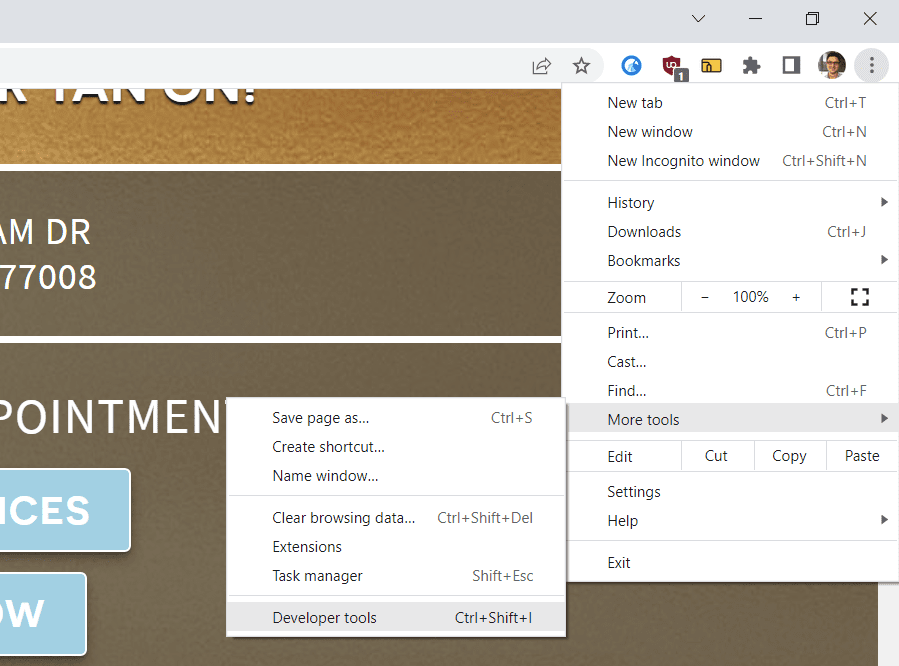
Viewing your page in a Preview tab, open up your browser’s web inspector. This example uses Google Chrome, but the concept is the same for any browser.
Opening Chrome Dev Tools on Mac
Step 5 – Locate the Modal Link Element within the HTML
Using the Dev Tools’ Element Selector, locate and click the modal’s trigger link, as shown in this video.
Locating the modal’s trigger link within the page’s HTML
Step 6 – Copy the <a> data-attributes
Right-click on the highlighted <a> element and select “Edit as HTML.” Then copy data-toggle="modal" data-target=".fusion-modal.bookingModal". Notice the bookingModal part. That’s the unique identifier I gave my modal earlier, and it will be whatever name you give to yours.
Copying the Modal Trigger’s data-attributes
Step 7 – Add the data-attributes to the Button Element
Go back to your custom Fusion Button from Step 2, and paste the copied data-attributes in the “Button Additional Attributes” field. Be sure to change all of the double quotes (") to single quotes ('), otherwise it won’t function. After making this change, my attributes to paste become data-toggle='modal' data-target='.fusion-modal.bookingModal'. You can leave the Button URL blank.
Easy peasy!
Activating Tanspire.com Booking Modal from a Fusion Button
Don’t forget to delete the temporary Modal Text / HTML Element you created earlier. Feel free to question in the comments, but hopefully these steps can walk you through the process of triggering an Avada Modal with a Fusion Button. Thanks for reading!
Related Post
If you’re looking for a new or refreshed website, contact me today and let’s get started.


One thought on “How to link an Avada Modal to a custom Fusion Builder Button”
Works great! THX!