How to use Flywheel’s billing transfer feature
WordPress hosting company Flywheel includes a unique feature where you can easily transfer billing to your client. It’s not immediately obvious how to enable this ability though. The CTA buttons on the Client Billing Transfer page and Free WordPress Sites page both just link to their Plans & Pricing.
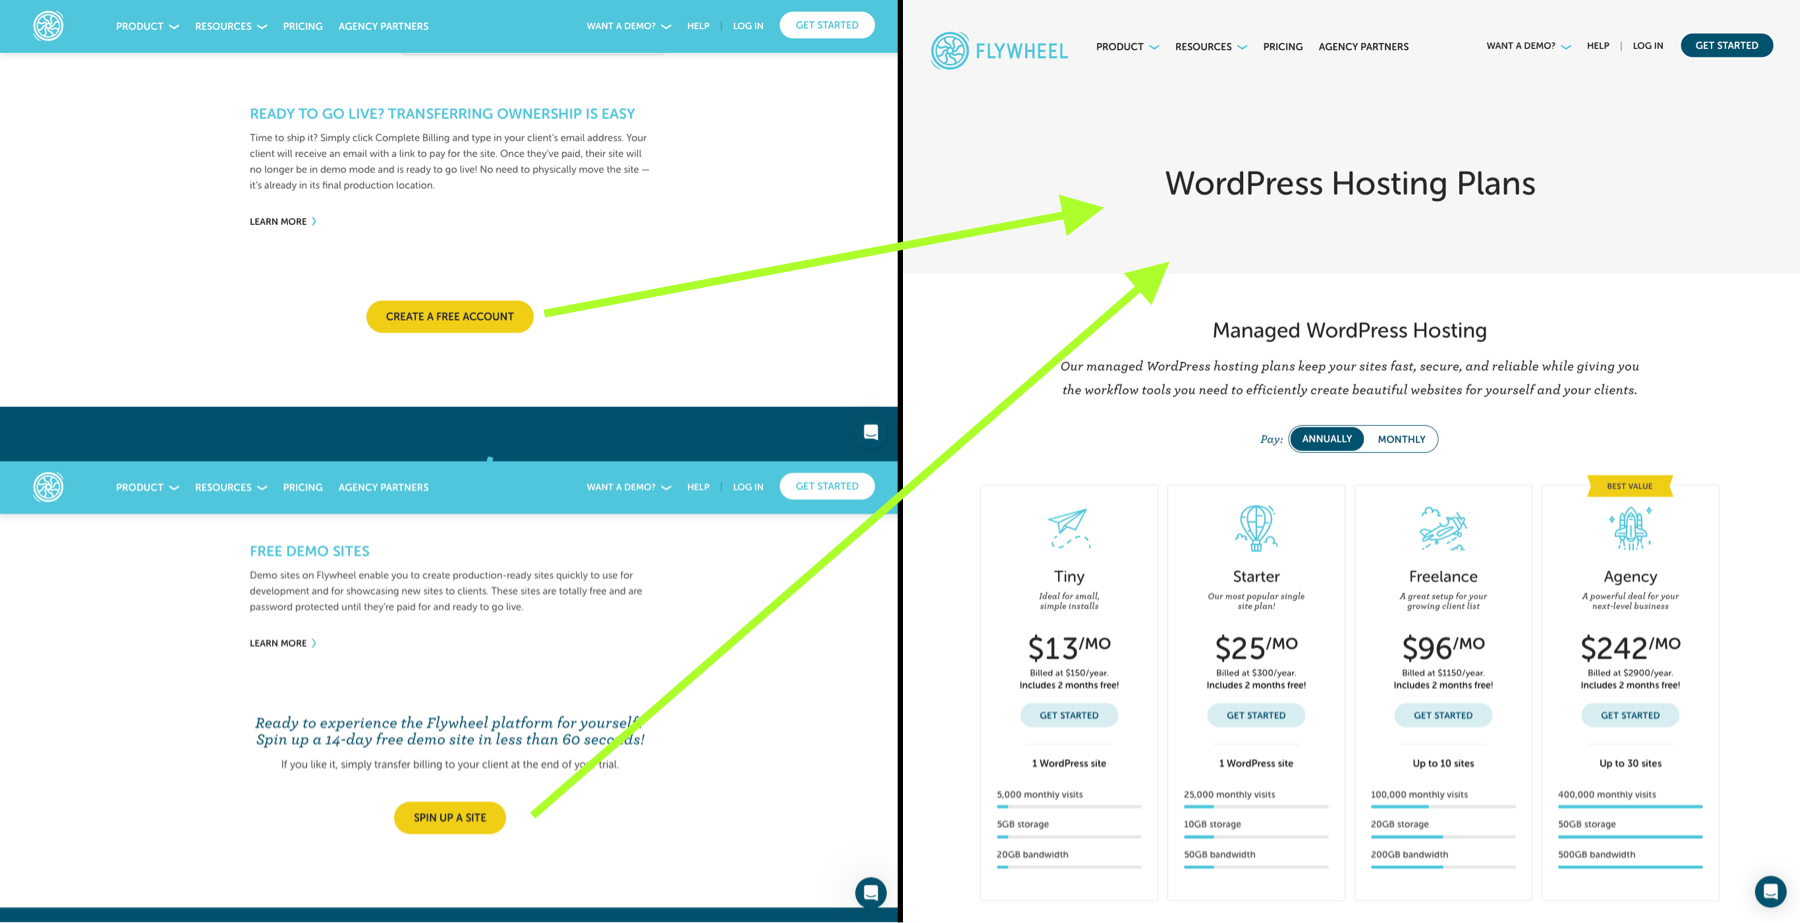
Clicking either of these links embarks you upon Flywheel’s customer acquisition pipeline. It gives the impression that to access the client billing transfer feature, you first have to select a plan and pay up front. Only after that point would you be able to transfer billing. This could be considered a bit redundant though, because while, yes, you can send billing so that your client pays for the next renewal, you still need to chase them down with an invoice for the first payment you already made.
Here’s how to avoid paying that initial deposit and successfully send sign-up billing to your client.
Step 1 – Create a new account
Sign up for a new Flywheel account on this page – https://app.getflywheel.com/signup. Alternatively, you can navigate to this User Account Creation page by clicking on “Log In” at the top right of the home page, followed by “Sign Up” (also at the top right).
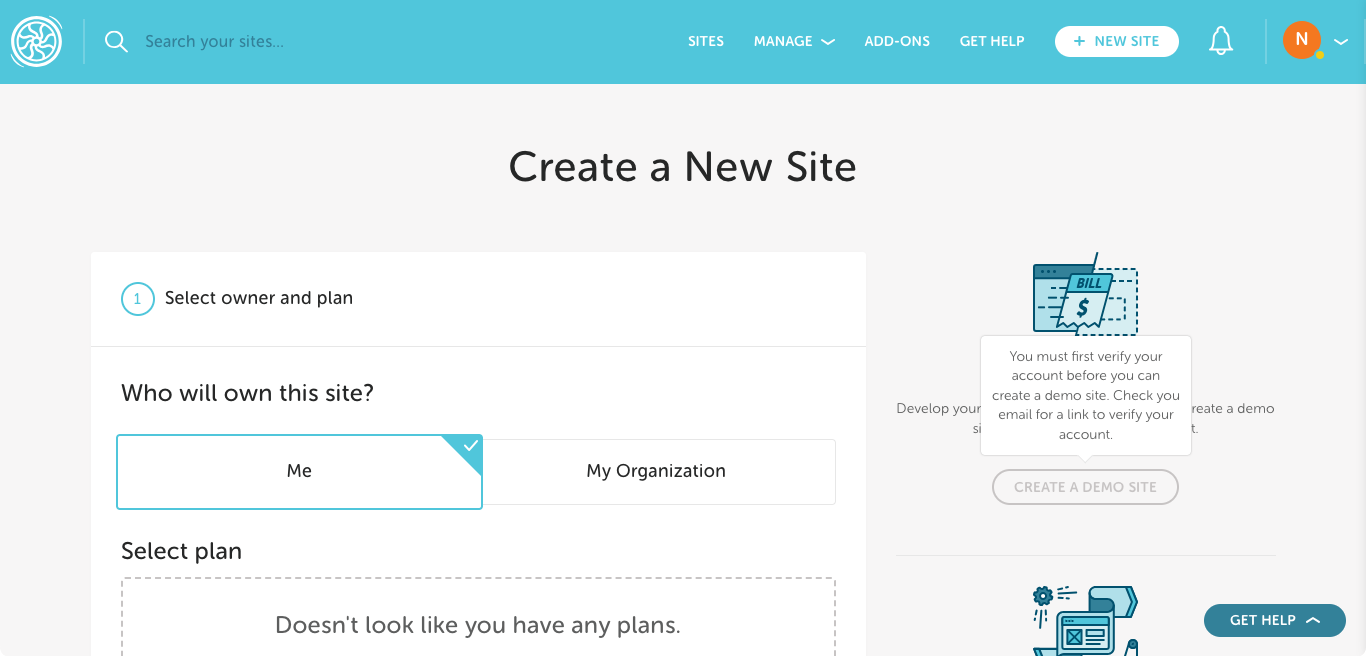
Step 2 – Create a new site
Once you’re logged in and have landed on your account dashboard, click the yellow “Create a New Site” button.

Step 3 – Create a demo site
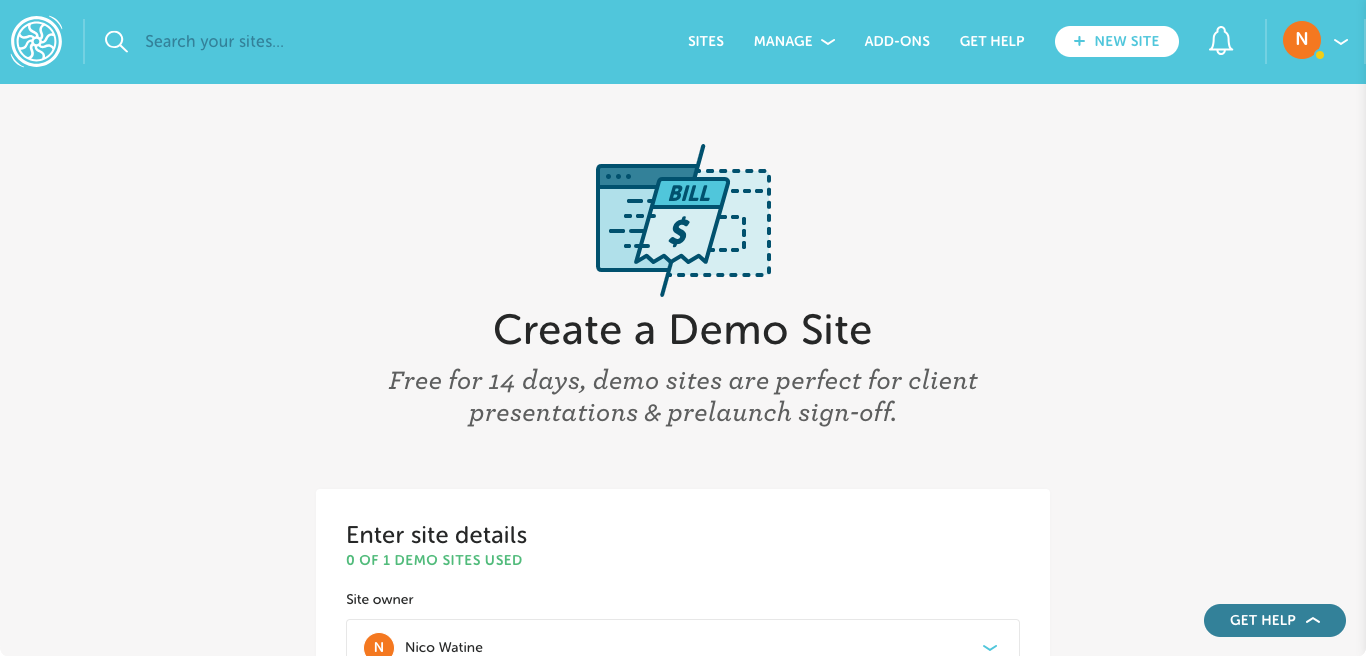
In the right-hand sidebar of the “Create a New Site” page, click the “Create A Demo Site” button. You’ll need to verify your account first by confirming your email address before being able to click this button.
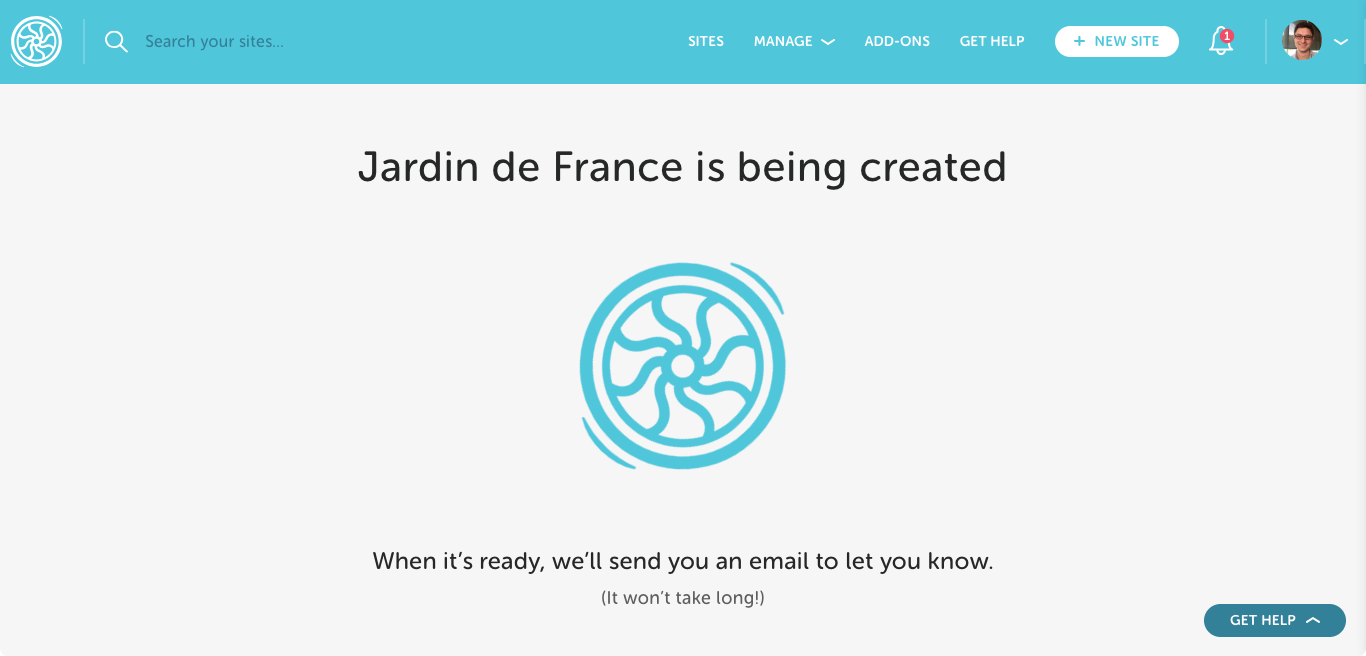
Once you do, enter your new site’s details and Flywheel will then begin setting it up. This takes a few minutes and you’ll receive an email letting you know once it’s done.
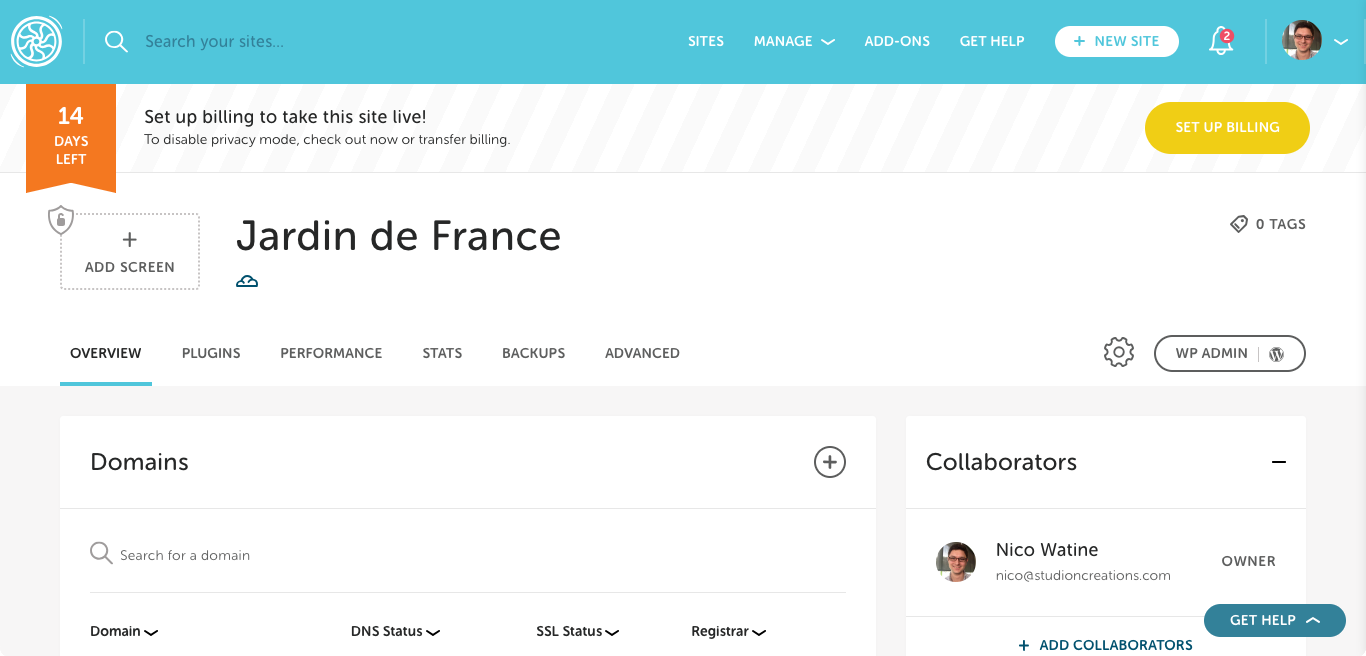
Step 4 – Set up billing
Once the site is created, you’ll see a banner across the top of your dashboard letting you know how many days are left in your trial. Click the yellow “Set Up Billing” button on the right of this banner.
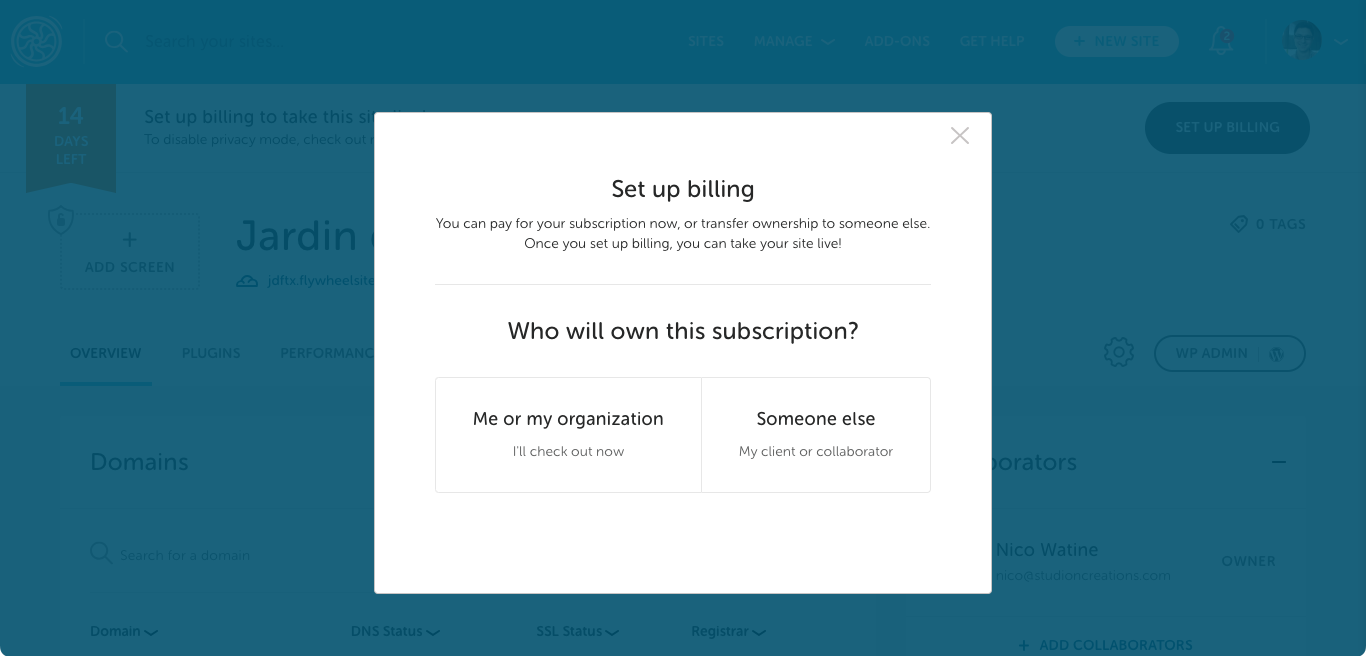
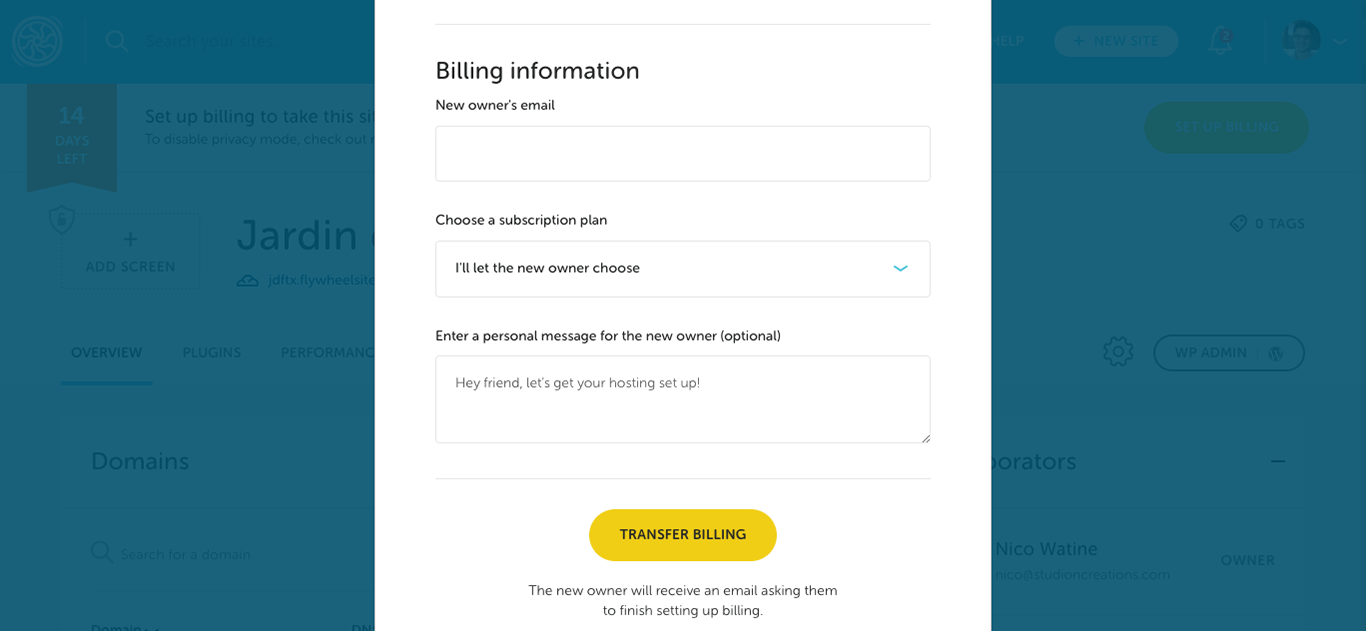
Then select “Someone else” in the modal that pops up. Scroll down the modal, enter your client’s email address and choose your subscription plan. You can also write a note that gets included in the email that your client will receive.
All done!
With these 4 steps completed, there will now be a yellow “Revoke Transfer” button on the right of the trial timer banner. Just in case you need to cancel the process, this is what you would click.
Thanks for reading.