
Increasing WordPress’ 8MB limit with MAMP Pro (Updated for MAMP 6)
TL;DR
- When using MAMP Pro for local WordPress, increase the default 8MB upload limit to 64mb by adding a
.user.inifile in the root.
MAMP is a great tool for locally developing WordPress sites on macOS.
In addition to its ability to manage multiple installs, the upgraded MAMP Pro version also allows you to specify an install’s PHP version.
The primary drawback with MAMP is it sets an install’s default settings to limit your uploads to 8MB. For almost any site, an 8MB limit doesn’t cut it.
How to increase upload max filesize with MAMP 5
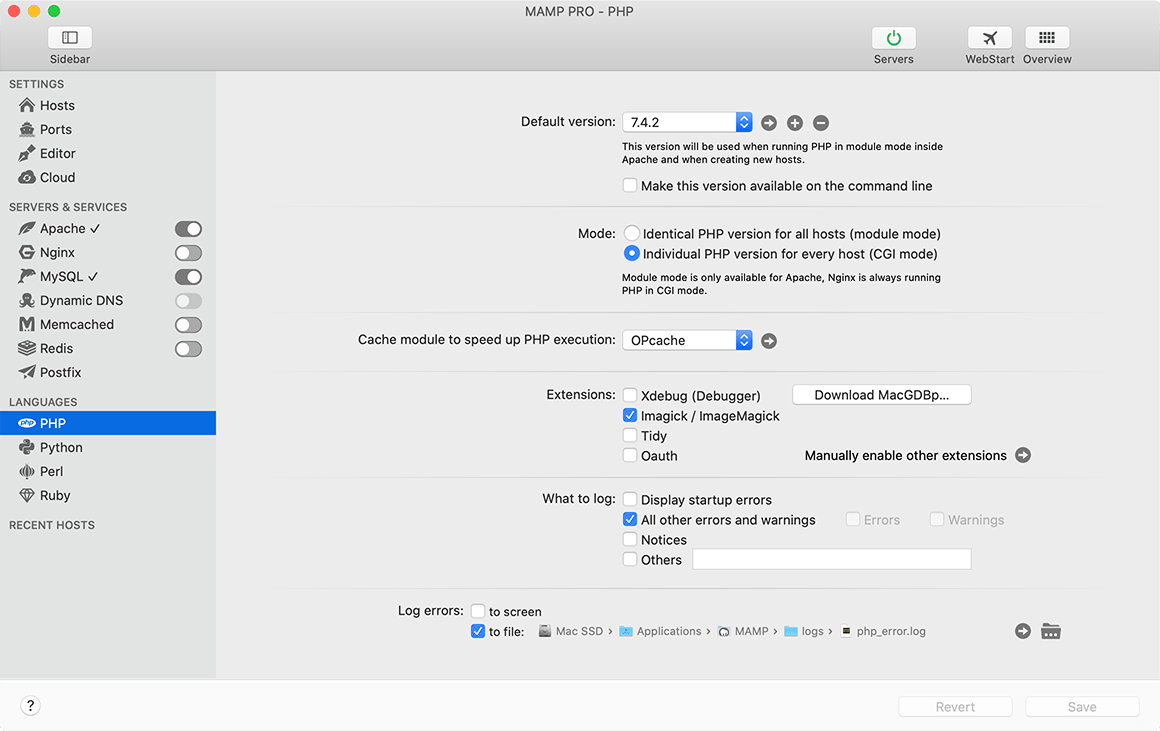
The first step to increasing the 8MB limit in MAMP Pro 5 is changing the Mode settings from “Identical PHP versions” to “Individual PHP Versions” on the PHP tab.
How to increase upload max filesize with MAMP 6
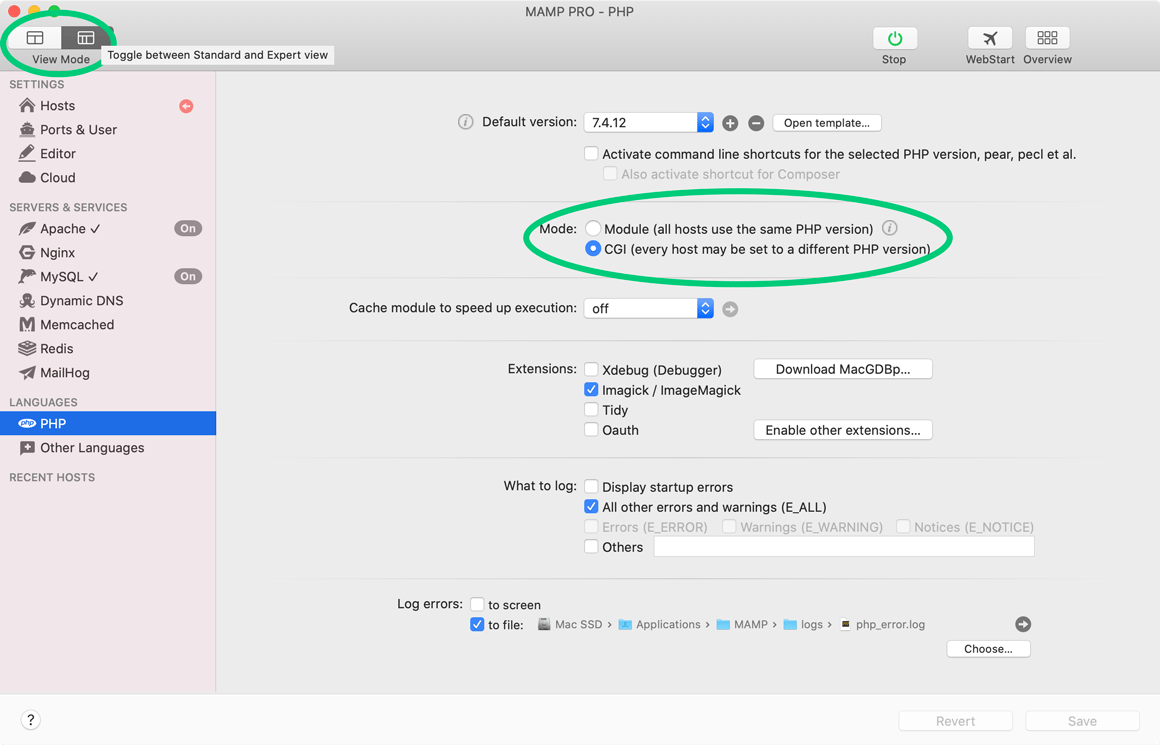
To increase the 8MB upload_max_filesize limit in MAMP 6, first be sure to activate “Expert View,” because the PHP tab is not visible in “Standard View.” From there, change the “Mode”from “Module” to “CGI.”
The magic file
The final step is creating a .user.ini file within the site’s root directory. Since it’s an invisible file (due to the preceding period) you will probably need to use your IDE of choice.
Below are the necessary entries to the .user.ini file to increase the 8MB limit to 64MB.
upload_max_filesize = 64M
post_max_size = 64M
memory_limit = 400M
file_uploads = On
max_execution_time = 180
Lastly, click Save, restart the MAMP servers and you’re good to go!
Related Post
I’m a web developer by trade and Mac enthusiast at heart. If you ever need help with either of those things you can always reach me at nico@studioncreations.com.
12 thoughts on “Increasing WordPress’ 8MB limit with MAMP Pro (Updated for MAMP 6)”
The first step to increasing the 8MB limit is changing the settings from “Identical PHP versions” to “Individual PHP Versions” on the PHP page. where?
In the MAMP Pro main window, on the left side, you should see “Settings” at the top, and then “Servers & Services” below that, and towards the bottom, “Languages.”
Under the “Languages” heading, select “PHP.” Then you will see a section labeled “Mode.” That section should have 2 radio buttons – 1 button for “Identical” and another button for “Individual.”
After selecting “Individual,” click “Save” at the bottom right of the window, and if you are prompted to restart the servers, select “yes.”
Thank you works like charm.
Thank you worked perfectly
Glad it helped!
Thanks this worked for me
Great – thanks so much for your help; worked a charm
Thanks for the feedback David! I’m glad it was helpful
This was super helpful, cheers!
Awesome! Thanks Victoria
Thank you! It’s great to find a solution that really works.
Thanks Jared! Happy to help