
Pro Tip: Screen Recording on iOS
How to easily record your iOS screen without QuickTime
Screen recordings can be useful for an app developer or web designer when she wants to present animations or UX interactions. Whether it be for a client pitch or a glossy portfolio presentation, a screen recording can always be handy.
Generating a high quality recording is not always a quick and easy process though. On macOS, it typically requires tethering your iOS device to your computer and using QuickTime player to initiate the recording. The primary issue with this is it requires you to be at your computer. Additionally, QuickTime tends to output large file sizes.
Fortunately, the latest 11.3 iOS update provides an easy and simple method for producing a screen recording.
Setting It Up
The screen recording is initiated via a Widget that is added to the Control Center.
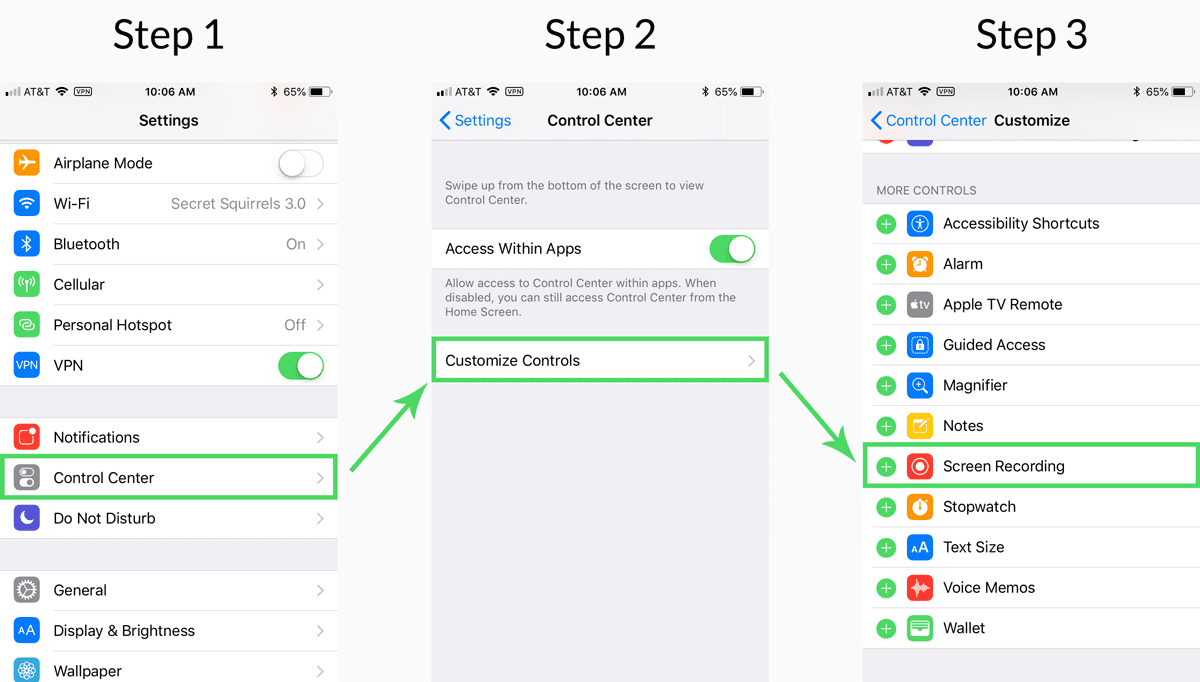
Customize the Control Center by going to Settings → Control Center → Customize Controls. From there, scroll down until you see “Screen Recording.” Tap it to add the widget to your Control Center.
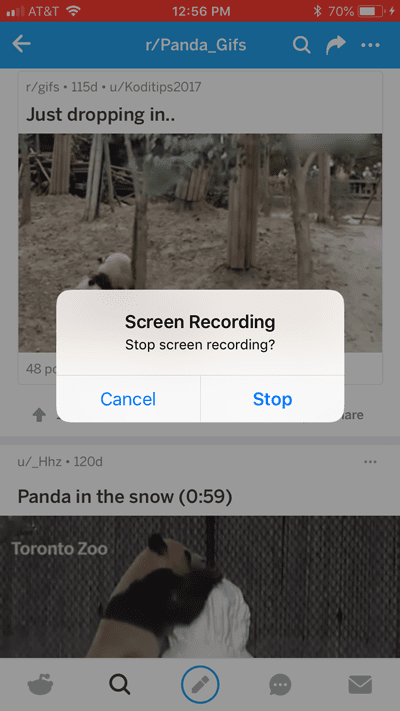
Swipe up to open Control Center, and then tap the Screen Recording icon once to begin recording videos of Giant Pandas.
(If any of the Youtube videos fail to load, just refresh the page)
To finish the recording, tap the red bar at the top and confirm you want to cancel.
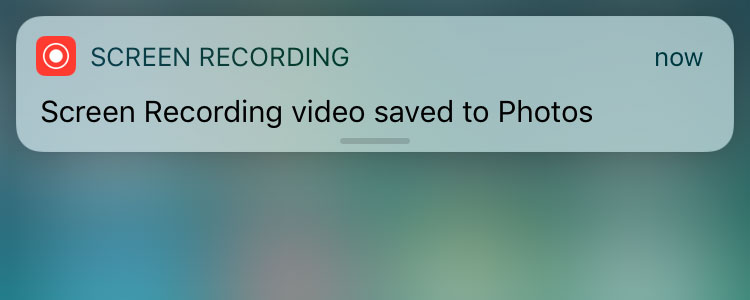
The recording gets saved to your Photos Library.
So simple!
I’m a web developer by trade and Mac enthusiast at heart. If you ever need help with either of those things you can always reach me at nico@studioncreations.com.
One thought on “Pro Tip: Screen Recording on iOS”
Useful notes. Animated GIFs can work well in email, but keeping the file small and the first frame clear makes a big difference for real inboxes.